
For many years I have picked up and admired the “lace leaves” that tiny insects create – you’ve seen them, the leaves that lie on the ground with the most delicate and beautiful of structures left behind after insect feasting and devastation. Here is a paradox worth considering!


I have knitted 2 of these sculptures now, each measuring approximately 48 inches long by 18 inches across. They can be made smaller or larger and that all depends on the size branch that I use as an armature support. Here’s how I make them for those wonderful people who love them and want to discuss the process with their friends.
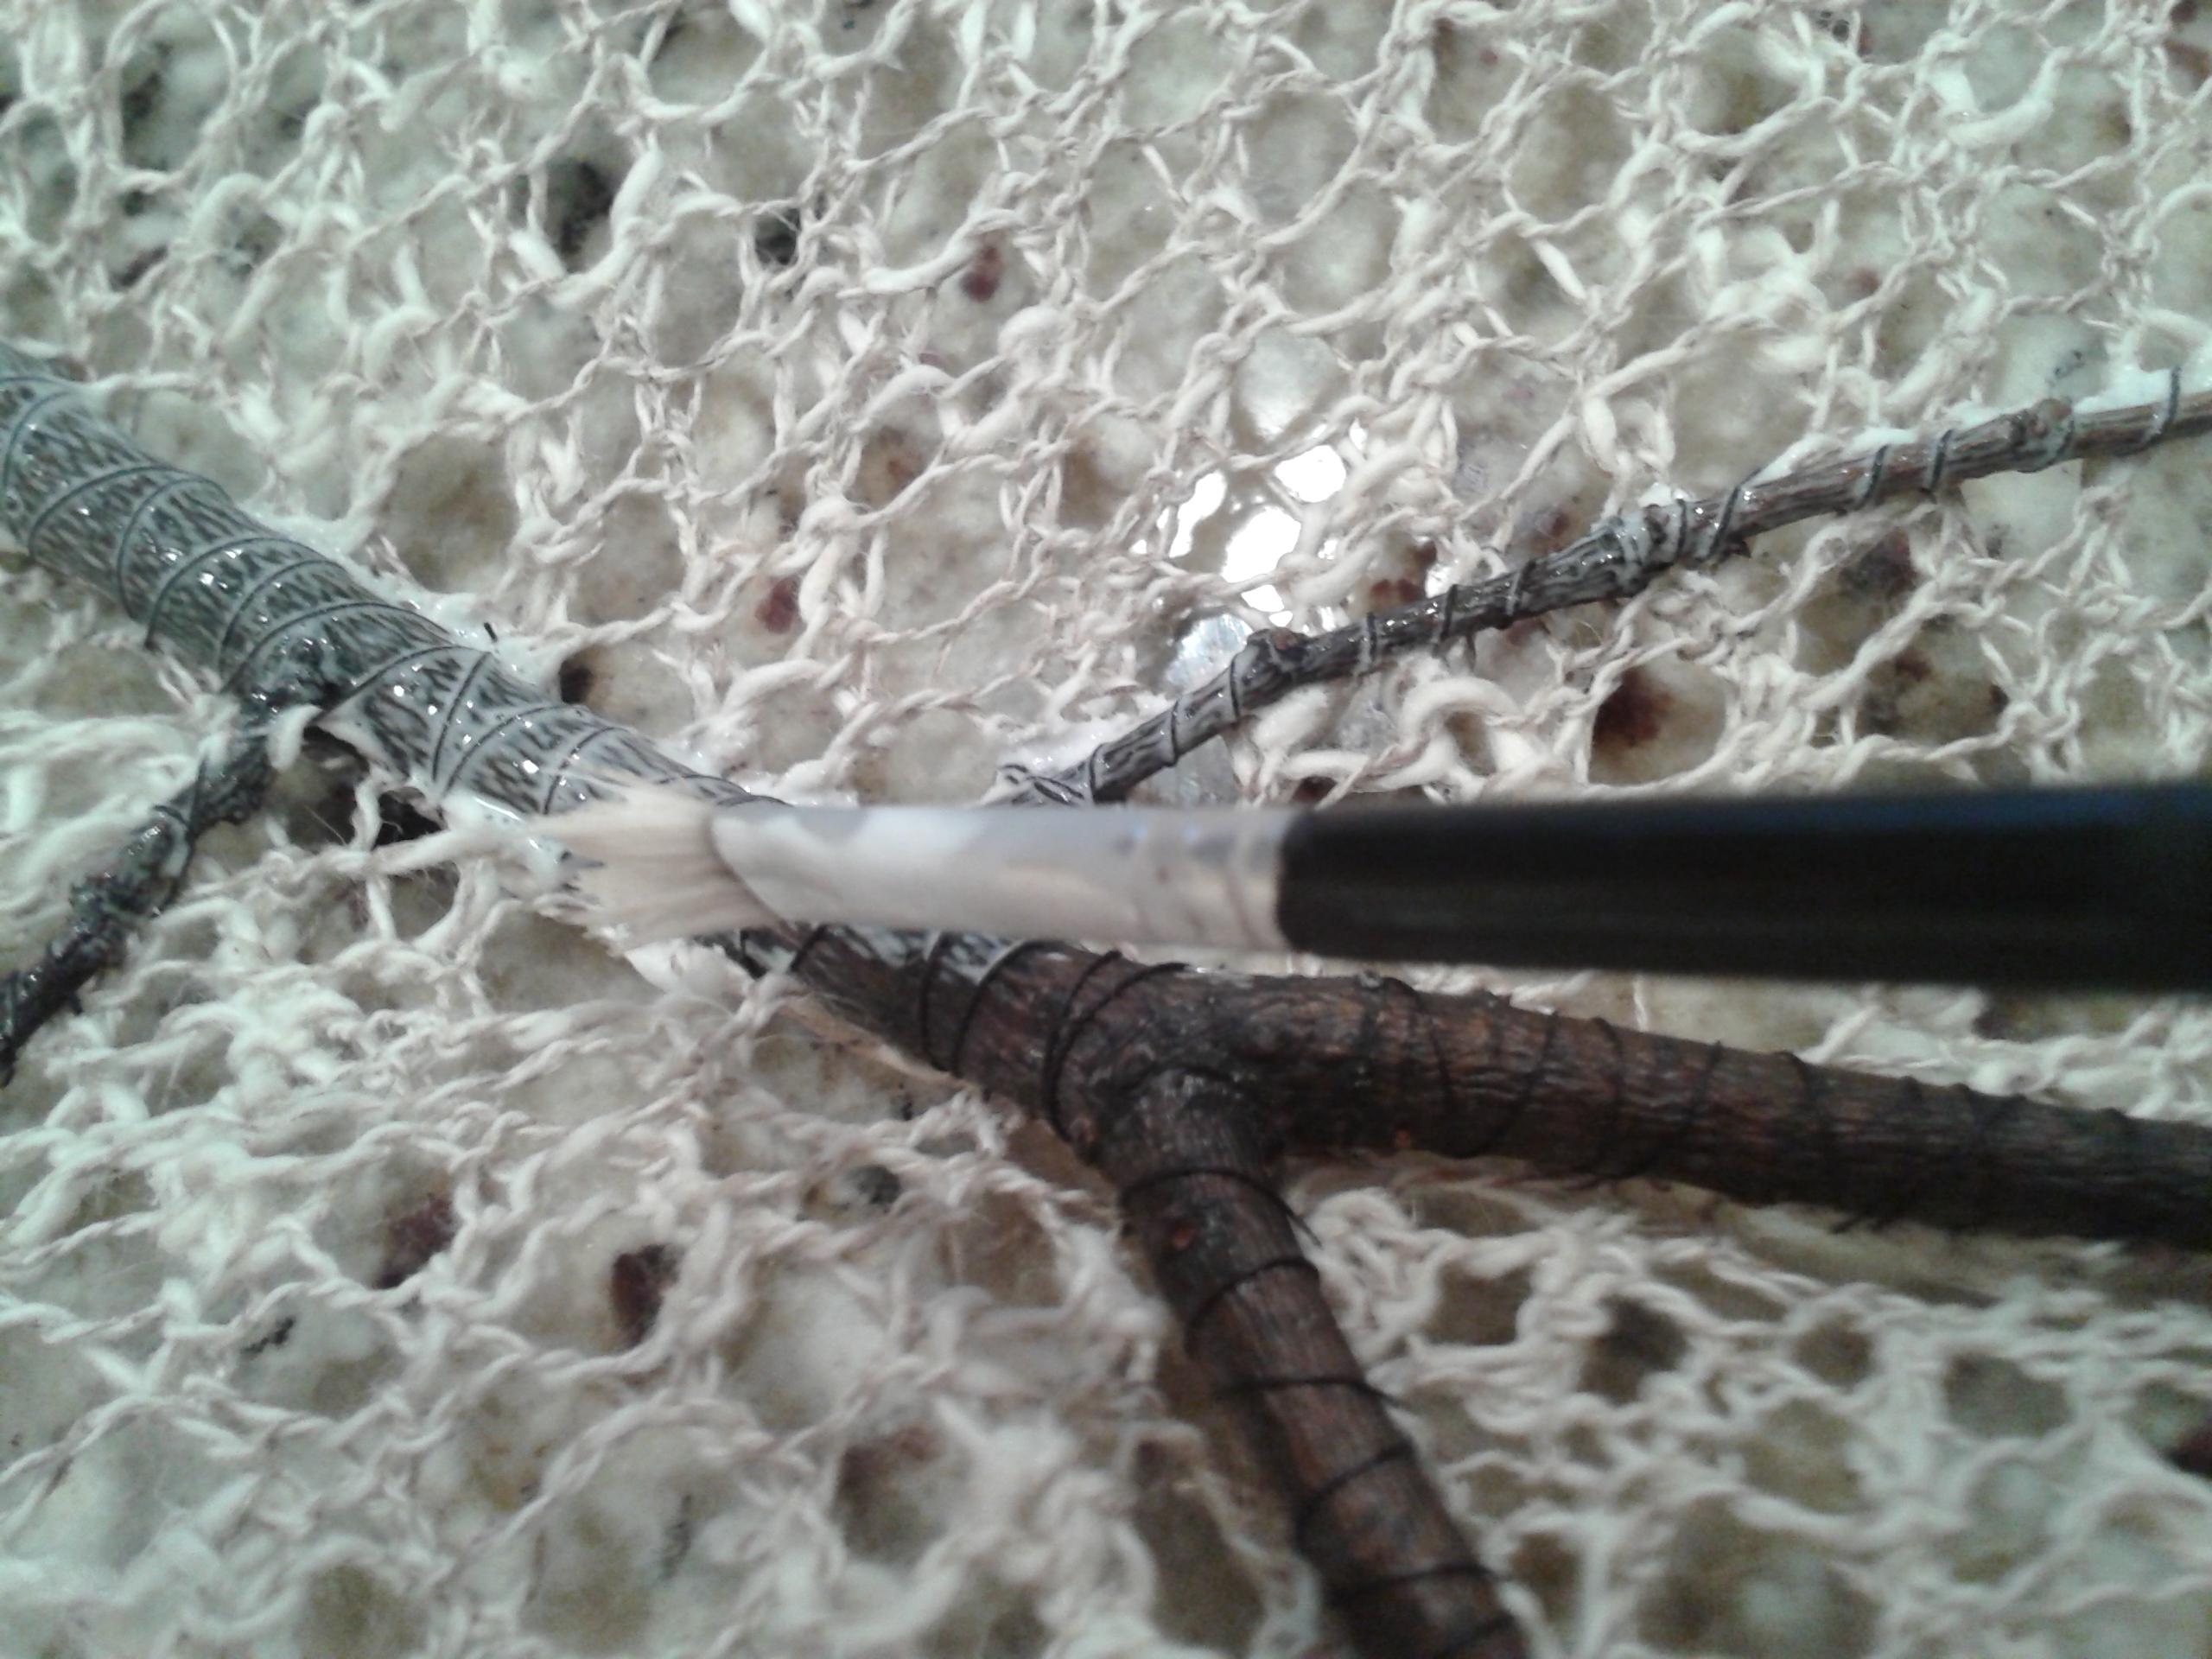
I start with a branch that is freshly cut and which offers a pleasing symmetry – I am, after all, turning a branch into a leaf with life-supporting veins. After searching my garden trees I decided that the Linden tree on our boulevard offered just the right structure, and the branches that would have needed pruning, were not being cut unnecessarily.


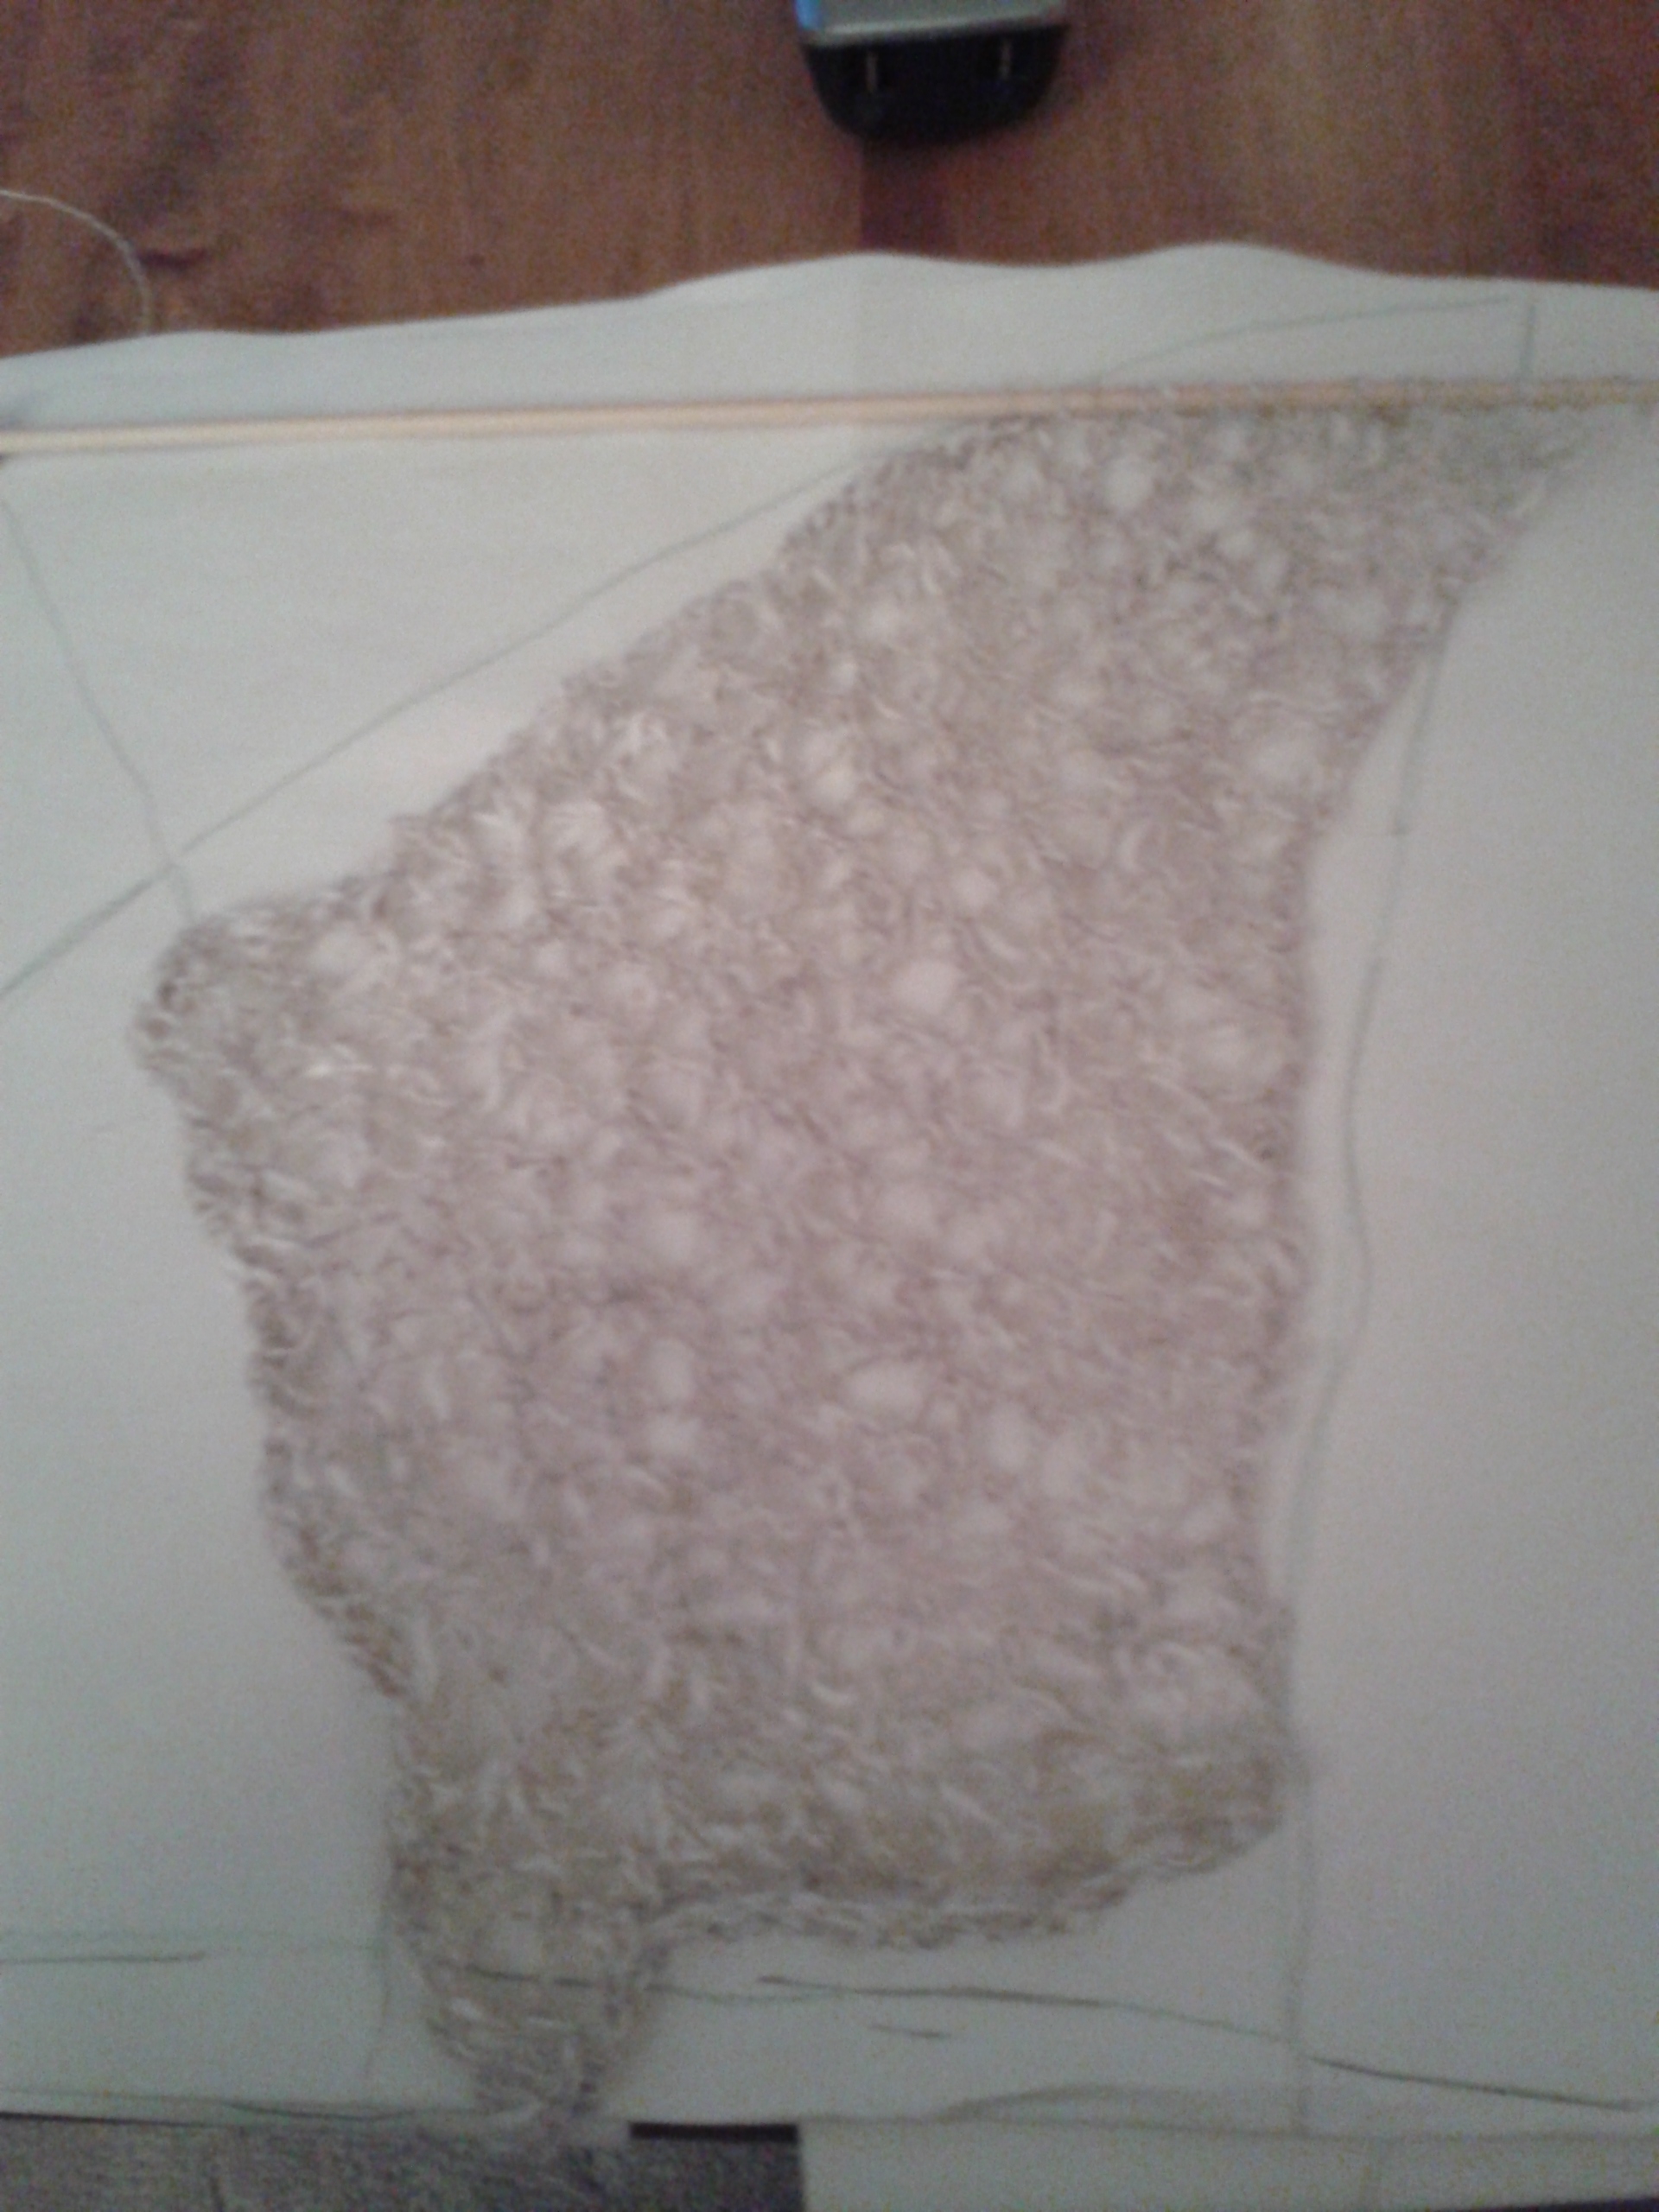
From the selection of images above you can see the first stages from finding a real “lace leaf”, selecting a symmetrical branch, pruning it off the tree, removing the leaves, squashing flat on a large sheet of paper, tracing the outline that will provide the pattern for each individual section of knitted lace to flattening the branch under plywood while I am working on the actual knitted structure. I estimate 3-4 weeks on each leaf as I reserve this work as a portable project to work on when I’m waiting somewhere or in the evenings when I’m too tired for my studio.


So now you can see the sections being filled with knitted lace blocks, each shaped to fit exactly. My lace stitch is “free-form” meaning that there is no pattern and that is intentional. Do insects follow a pattern? Highly unlikely, so that’s my rational. If a pattern looks as if it’s emerging, then I intentionally take the pattern in another direction – a little harder to do than it might seem. I knit in sections partly to keep the lace confined and to create a “vein” between the blocks, which will eventually be dyed with walnut dye – of my own making from partly decomposed walnuts, thanks to my squirrel helpers. I use a very fine cotton slub-linen blend that have have had for some time, which I obtained from the Cambridge Mills in Cambridge Ontario. I wish I could find a similar yarn as this cob has almost run out. I intend to call the mills to see if they might have something to replace this precious resource.
Work on the leaf is progressing. Meantime, new ideas are evolving. I am always amazed at how unlikely objects have elements that relate: texture, colour form and sensibility. Here I am showing a new photo taken of my summer “Tomato Fields” in Fenwick, only this one is the first snowfall of our 2019 winter, early November. I can see this as a fairly large piece worked up using my needle felting with silk technique. I am also working on a new sculpture that I’m presently calling “Carrara Marble in Silk.” It stands about 4 feet tall and 18 inches wide x deep. Over the initial armature of wood and wire I am layering paper maché paper, then will build up quilt underlay before the final silk fusion of various types/tones of white silk. I can’t wait until I get to this point.
Hopefully, they will be completed for installation at the Jordan Art Gallery by early December.


Just to show where I’m up to with the leaf. About 4 more sections to complete the main structure, then the centre stem is knitted separately. The two sides are stitched to the centre stem and all stitched to the wood frame – still being pressed.


Here are the last stages of completion:
The centre stem of the leaf is knitted in stocking stitch to create a solid fabric. The piece starts off wider and tapers towards the tip of the leaf. Once the long centre section is completed, the two side sections must be aligned correctly with the side “veins.” When all is pinned in place, the stem is sewn down to the sides.


Once the centre stem is attached the completed surface of the leaf is loosely tied in place then stitched securely. Although I do not have an image, there is a step in which the entire under surface is coated with my clear cellulose paste to shrink and stiffen the fabric. When dry, the leaf is flipped over and using walnut dye which I make myself by boiling ripe walnuts, I stain the centre and side ribs of the leaf. I like to start with a diluted solution and repeat the process several times to build up the intensity of darkness. This enables a more controllable and natural result as in the actual leaf, the centre and thicker part of the stem is darker, lightening towards the tips.
My leaf is just about done. The ends of the branch are trimmed back then I coat these ends and stitches on the back of the branch with white glue which adheres to the edges of knitting and seals the stitches in place.


I am excited to see the end result:
Carefully transported to the Jordan Art Gallery, it is now suspended below my newly installed Christmas selection. The leaf can be hung vertically, horizontally against a wall or suspended in a space to create a light partition.
Hope you enjoyed watching the evolution of my “lace leaf.”


Your lace leaves are so wonderful. We are so happy to have one of them in our home. Thank you for sharing with us and your followers the intricate, time consuming and so creative methods you have for making them. I look forward to your updates on completing your lace leaves.
Pat